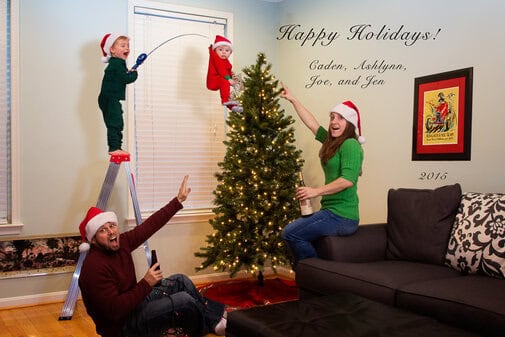
In this post, we’re going to go over the basics of how to make crazy things happen for your holiday card by making a composite photo. This isn’t going to be an in-depth tutorial of compositing, more just an introduction to the concepts and how to approach putting one together. We’re going to cover a concept called compositing in place, which is a simpler way to put together a composite without a lot of detailed changes or time in Photoshop.
You Need A Plan!
Before you begin, you need to have a solid concept, and you should have it written down, preferably with a picture. I try to storyboard out what I am thinking not only to make sure what I’m thinking does make sense on some level, but also to communicate the idea with my family. Seeing the basic concept drawn out can help you to develop the story you want to tell with the picture, and also let you start planning what accessories/tools you’ll need to gather and what furniture you’ll need to move to accomplish your vision. At this point, the plan doesn’t have to be detailed, but should have enough information to figure out where to start. In fact, it’s better to keep things a bit loose, because as you start shooting, things will pop up that affect the plan, and you’ll have to call a few audibles.
Start with an Empty Scene
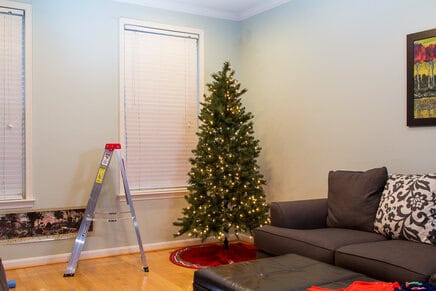
Once you’ve gone through some tests to get all your props in the proper location and the lighting how you want, now is the time to take a picture of your background plate. This image will be the bottom layer in your composite and help when things need to be shifted around later. Also, after taking your background plate, give a hard look at the picture and see what distracting elements you didn’t notice when taking the shot – things like red clothes on an ottoman, or your kid’s dinosaur mural on the wall. Go ahead and clean those up and retake your background plate (unlike me for this one).
One thing I will strongly suggest for this – use a tripod for your camera so it’s in the exact same position for every shot. Also, put your camera and flashes (if you’re using any) in manual mode. You can get the settings for the camera by using Aperture mode first if that makes it easier, but then switch to manual mode and set the camera to those same settings. For the flashes, it may take some trial and error to get them right. You don’t want anything changing once you’ve started shooting. I had this problem with this composite, and I had a lot of extra work to do to fix exposure differences.
Start Adding your Elements – One at a Time
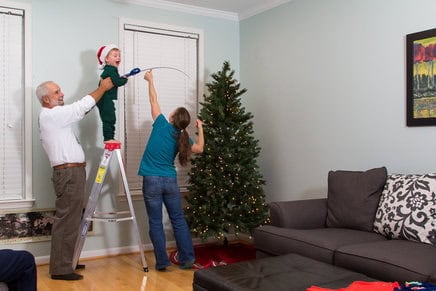
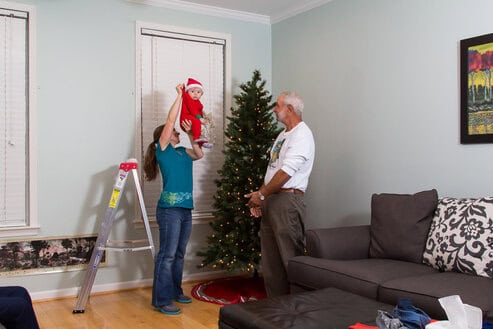
This is where the fun starts – taking pictures of everyone. Do it one at a time to make it easier to control things, unless an interaction between people in the image is required. Take a bunch of shots of varying expressions and body positions so you have options later.

My Wife’s Shot 
Me Acting Scared
To the Computer!
Now that you have all the shots for your composite, it’s time to put it all together. If you shot them in raw, use your raw processor to make the initial adjustments and ensure the exposures are all the same. Then, on to photoshop!
Add Your Layers
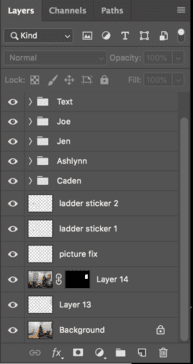
I have a lot going on in this picture – mostly because there were a lot of little things I didn’t like. If you notice on the ladder there are warning stickers. They were distracting, so I digitally removed them with some strategic cloning. I also added a picture because the wall to the right of the tree looked very empty, and removed the bit of picture that was at the edge of the frame. Paying attention to all these before taking the pictures would have saved a lot of time.
Add in Each Person
I put each person in a layer group because it made everything much cleaner. For me and my wife, adding us was easy: just make the layer visible, and mask out everything around us. That’s the beauty of compositing in place – no complicated masks or cleanup, because everything lines up. My kids had some more complicated issues to deal with though.
Fixing Problems
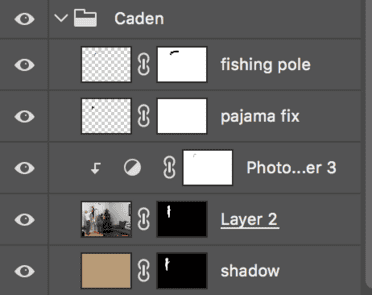
My son had two problems: my dad was in the way, since we didn’t trust my three year old to stand on the top of the ladder and pose, and the fishing pole was at the wrong angle for what I wanted. The fishing pole was easy to handle – I copied the pole and his hands, then just rotated it up to where I wanted it. Then masked out the original pole (with the background plate underneath, everything lined up when I hid the pole). Removing my dad and fixing the pajamas where his arm was holding him took a little bit of clone stamping and healing to hide well, but still wasn’t too bad. I also had to fix the shadows to hide my dad. In the end, I copied the cut out of my son, gave it a solid brownish color, and faded and blurred it until it matched the ladder shadow and looked realistic.
The Hard Work
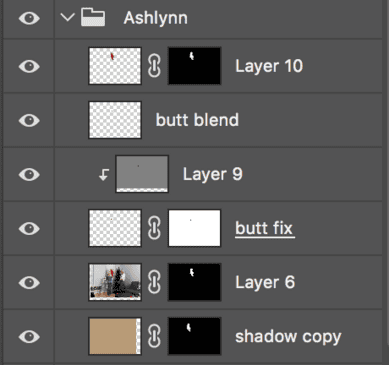
Fixing my daughter was more work. My wife is 5 feet tall, so she didn’t get our daughter up high enough. I had to do a lot of detailed cutting out for this so I could move her into the right position. Also, my wife’s hand was covering her butt and leg, so I had to fix that. There was a lot of cloning and healing to make it look reasonable, and that took a while to figure out. If you look close, I still didn’t get it quite right, but it’s a small thing that at normal size you’d never notice unless it was pointed out to you, so I let it go. I also had to recreate her shadow the same way I did for my son earlier.
Finishing Touches

To finish the card, I added the text, then we had it printed. We usually print our cards at Nations Photo, since they have a pretty fast printing time and shipping from Hunt Valley, MD is quick.
Your Turn
Are you making a holiday card this year? Post them in the Howard County Dads Facebook group for everyone to see! We’re shooting ours this weekend and going to try something new and very, very messy. But this was Jen’s idea, so I can get away with it…hopefully.

